
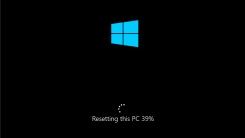
Hacked Windows 10 Themes Can Swipe Your Microsoft Login
Windows 10 users can customize their desktops with unique themes, and are able to create and share those themes with others. Hackers can also use them

One of the great things about iCloud is that you can store lots of pictures. One of the bad things about iCloud is that you can store lots of pictures. Here are some tips to help you back up and organize all your thousands of photos without doing too much sifting through memories of Halloween 2017.
To back up the photos somewhere besides the cloud, open up the Photos app on your Mac. Then open Preferences, and select the iCloud tab. On that page, select “Download originals to this Mac”. That will save all your photos locally to your computer. If you want to add an external hard drive for extra safety, you can use third-party software like Backblaze, or your Mac’s built-in Time Machine function, which will back up the rest of your computer as well. To manually move all the photos over, just plug in your hard drive, open Finder, go to Pictures, and drag the Photos Library over to the new hard drive.
If you’d like to organize your photos so they are easier to navigate, go to iCloud.com and log in with your AppleID. Then select Photos and click the plus sign at the top to create and name a new album. With the new album created, simply select one or multiple photos, and click the plus sign again to select where you’d like to send them.

Windows 10 users can customize their desktops with unique themes, and are able to create and share those themes with others. Hackers can also use them

A new phishing scam is duping unsuspecting victims with enticing links promising access to President Trump’s alleged health records and top-secret COV

It’s that time of year again: Spotify is here to tease you remind you about your musical habits over the past many months. Most people should have a p
Every Windows PC can benefit from a spring cleaning. Hell, it doesn’t even have to be spring. If you can’t remember the last time you saved all your c

We love to joke that no one uses their smartphone to actually make calls in 2021. And even if that’s kind of true, we obviously need these devices to

We’re rapidly entering the era of 4K as the standard resolution, and new 4K content is available on YouTube every day. Unfortunately, you can’t watch

Can you sense the darkness creeping across the internet? That’s the new dark mode rolling out to the main Google Search website right this moment. Tha

If remote work has taught us anything, it’s that many of our meetings are unnecessary and overly complicated, especially if teams are spread across ti
We are a comprehensive and trusted information platform dedicated to delivering high-quality content across a wide range of topics, including society, technology, business, health, culture, and entertainment.
From breaking news to in-depth reports, we adhere to the principles of accuracy and diverse perspectives, helping readers find clarity and reliability in today’s fast-paced information landscape.
Our goal is to be a dependable source of knowledge for every reader—making information not only accessible but truly trustworthy. Looking ahead, we will continue to enhance our content and services, connecting the world and delivering value.